Adding Device Custom Field
Administrators can create custom fields to capture business-specific data that is not included in the standard inventory. These fields enable organizations to customize device information to meet operational requirements.
Creating Manual Custom Fields
This is a two-step process where you define the field details and set the properties for a custom field.
To create a Manual Custom Field:
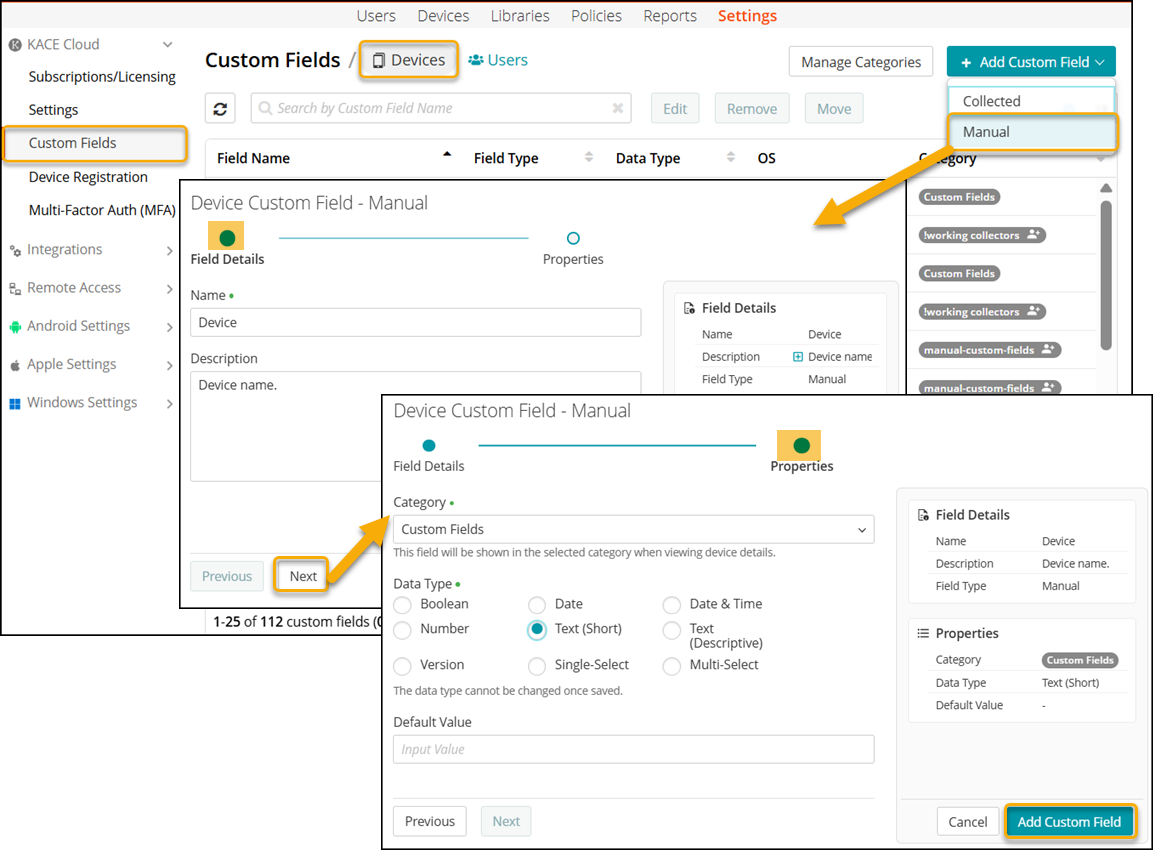
- Go to Settings in top navigation.
- In left navigation, select KACE Cloud > Custom Fields > Devices to open the custom field list.
- Click Add Custom Field to open a drop-down list.
- Choose Manual from the list to open the Device Custom Field - Manual dialog.
- In the Field Details tab,
- Name - provide the name of the Custom Field.
- Description - provide description for the Custom Field.
- Use the Previous or Next buttons to move between the tabs.
- In the Properties tab,
- Category - Choose an option from the drop-down list. This field will be shown in the selected Category in the Device Details page.
- Data Type - Select a data type from the available options.
- Default Value - (Optional) Set the default value for the custom field.
- Click Add Custom Field.
The saved Custom Field appears in the custom field list and can be viewed in the Device Details page.
Creating Collected Custom Fields
This is a three-step process where you define the field details, configure collectors, and set the properties for a custom field.
To create a Collected Custom Field:
- Go to Settings in top navigation.
- In left navigation, select KACE Cloud > Custom Fields > Devices to open the custom field list.
- Click Add Custom Field to open a drop-down list.
- Choose Collected to open the Device Custom Field - Collected dialog.
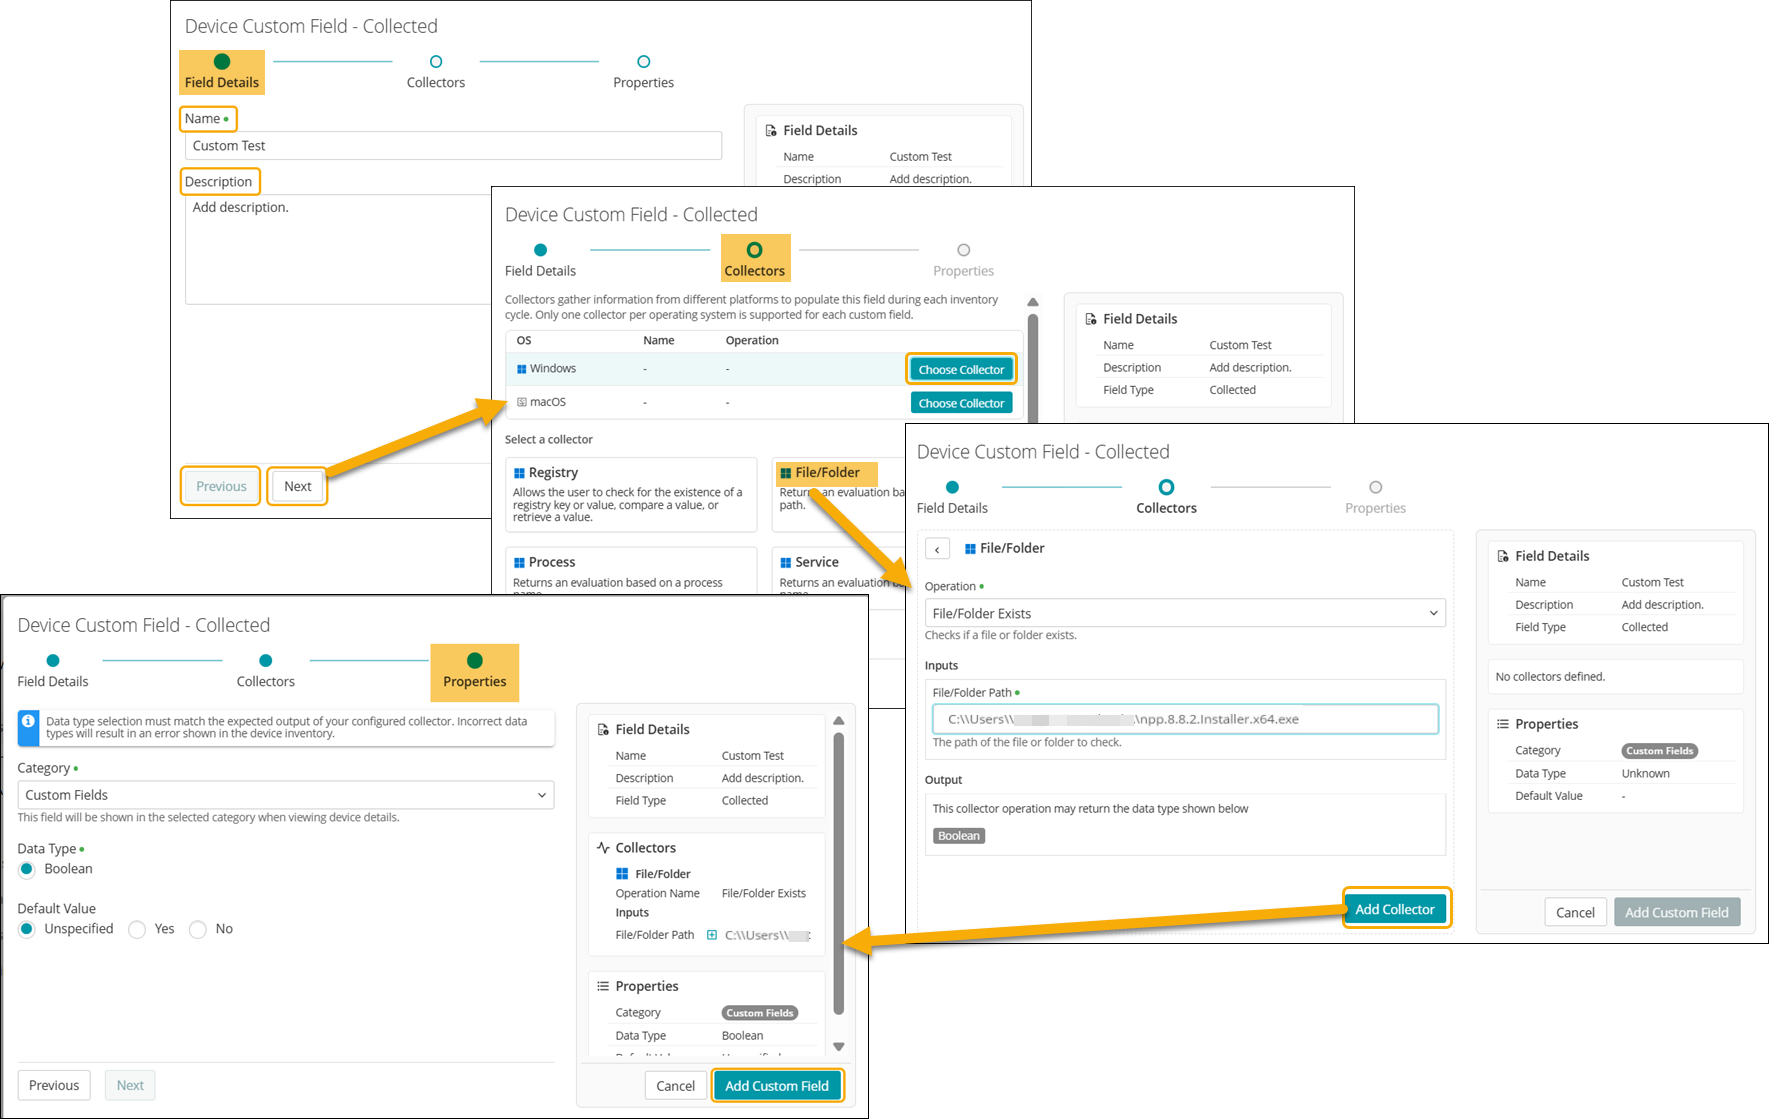
- In the Field Details tab,
- Name - provide the name of the Custom Field.
- Description - add description for the Custom Field.
- Use the Previous or Next buttons to move between the tabs.
- In the Collectors tab,
- Click Choose Collector to set up collectors for supported operating systems. This opens a list of available Collectors.
- Choose a Collector from the available options, and then click it to configure the details.
- Windows - Available Collectors are Registry, File/Folder, Process, Service, and WMI Property
- macOS - Available Collectors are File/Folder, Process, Service, and Plist Entry

NOTE: You can assign only one Collector per operating system to a Custom Field.
- Configure the Collector by entering details in the Operation and Inputs fields
- Operation - Select an operation from the drop-down list.
Depending upon the Operation selected, the fields in the Inputs section change. - Inputs - Enter the details in the populated fields.
- Operation - Select an operation from the drop-down list.
- Click Add Collector. You return to the screen that lists all your configured Collectors.
- Click Next to move to the next tab.
NOTE The Output will be displayed on the screen based on the selected Operation.
For more information on Collectors, see About Collectors. - In the Properties tab,
- Category - Choose an option from the drop-down list.
The custom field you create will appear under the chosen Category when viewing device details. - Data Type - Select a data type from the available list. This list depends on the configured collectors in the Properties tab.
For more information on the Data Types, see Supported Data Types.
NOTE: The Data Type selection should match the expected output of your configured Collector operation. Incorrect Data Type will result in an error.
- Default Value - (Optional) Set the default value for the custom field.
- Category - Choose an option from the drop-down list.
- Click Add Custom Field.
The saved Custom Field appears in the custom field list and can be viewed in the Device Details page.